
Asphalt paving is something you’ve likely done before around your home. Whether resurfacing your driveway or laying new pavement in your backyard.
But have you ever wished your asphalt job turned out smoother and longer-lasting? The truth is, getting perfect asphalt results takes more than just laying down the blacktop. There are some secrets to the trade that the pros don’t want you to know.
This article reveals the top five secrets for getting your asphalt paving job done right every single time. Keep reading to learn how to tackle your next paving project confidently.
1. Prep Your Base Properly
The success of any project starts with proper preparation. This is especially true for asphalt paving. If you want your new pavement to last for years without cracking or settling, taking the time to prepare the base fully is crucial.
Start by grading and compacting the area to be paved with a roller. Ensure drainage slopes away from the house at a rate of 1/4 inch per foot. Next, lay down a 4-6 inch layer of crushed stone or gravel and compact it thoroughly.
A solid base will give your asphalt the structural support it needs and prevent weak spots from forming. However, you must be cautious of the climatic conditions of your area. For instance, the Renton asphalt paving preparation is very vulnerable, especially in climatic conditions.
Consequently, close monitoring is an integral part of the pavements that asserts accuracy and finesse. Successful prep work is paramount when placed in the position of making a perfect paved area that will withstand the passage of time.
2. Tack the Existing Pavement
When resurfacing or overlaying an existing asphalt surface, using a tack coat is a must. Tack coat acts like glue between the old and new layers of asphalt, creating a strong bond. Without it, your new layer will likely peel up over time from traffic vibrations.
Apply a tack coat, which is a thin application of asphalt emulsion, to the clean existing surface right before laying fresh asphalt. This creates an adhering surface so the two layers fuse together rather than separating.
Follow the manufacturer’s instructions for proper tack coat application rate. Taking this simple step ensures your pavement resurfacing job lasts as long as possible.
3. Lay Asphalt at the Right Temperature
The asphalt paving corporations have designed and built intricate mobile machines for mixing, loading, and laying of asphalt at the required temperatures for the expected outcome from the performance.
However, temperature becomes a dictator for the microwave mum because it is still important. Asphalt needs to be between 275-325°F from the truck when it is on the road for the best performance.
If it’s too cold, the mixture won’t fuse together, forming a solid, and it may crack instead. It is not only too hot but will also be a little bit challenging to work with, as it is likely to distinguish the citizens.
By using an infrared thermometer gun, take the individual’s temperature and make sure they are not having a fever before spreading. If they do have a fever, isolate them as soon as possible.
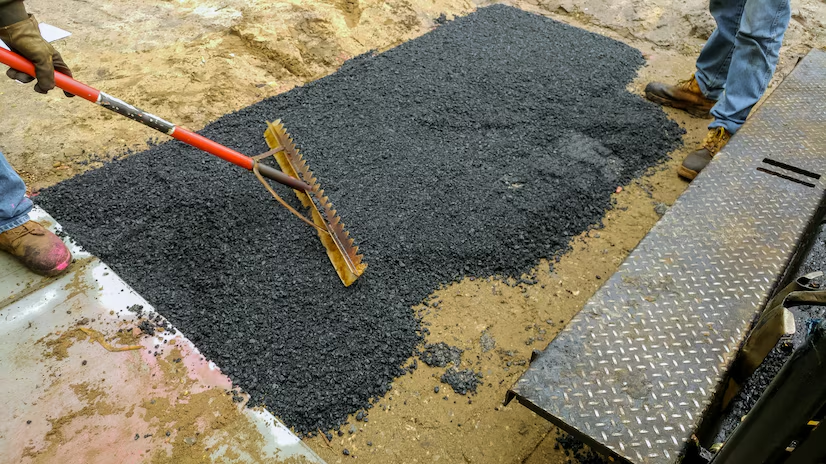
4. Smooth It with a Plate Compactor
No asphalt job is complete without proper compaction. This vital step forces out air pockets in the fresh laydown and allows the asphalt particles to bind together densely.
For small DIY projects, using a plate compactor is your best option. Start from the outer edges and work towards the middle, overlapping each pass by half. Make sure to compact in different directions – both lengthwise and across the width of the area.
Don’t be afraid to give it several passes for maximum density. Properly compacted asphalt will last significantly longer before cracks or potholes form. Take the time to rent a compactor and flatten it out like the pros.
5. Cure Before Using
Most people can’t wait to park on or drive over their shiny new asphalt, thinking it’s ready for use. In reality, asphalt needs time to fully develop strength through oxidation.
Prematurely exposing the surface to heavy loads or sharp turning can damage it. Generally, keep vehicles off for at least 24 hours after completion. Within 5-7 days, it will have gained over 50% of its strength.
Consider barricading fresh asphalt areas and planning any necessary work or traffic flow around the curing time. Letting your pavement fully gain hardness before driving on it, you’re helping extend its lifespan and ensure a long-lasting, high-quality finished product.
Conclusion
With these five secrets under your belt, you now have the insider knowledge needed to tackle any asphalt paving project with confidence your results will be perfect. Just be sure to prepare the base fully, apply tack coat on overlays, lay and smooth at the right temperatures, compact thoroughly, and allow ample curing time.
Following these simple best practices from start to finish means your driveway, patio or parking area will remain smooth sailing for many years. You don’t need to call the pros – now you have what it takes to nail it yourself every time.